The JupyterLab Interface
JupyterLab provides flexible building blocks for interactive, exploratory computing. While JupyterLab has many features found in traditional integrated development environments (IDEs), it remains focused on interactive, exploratory computing.
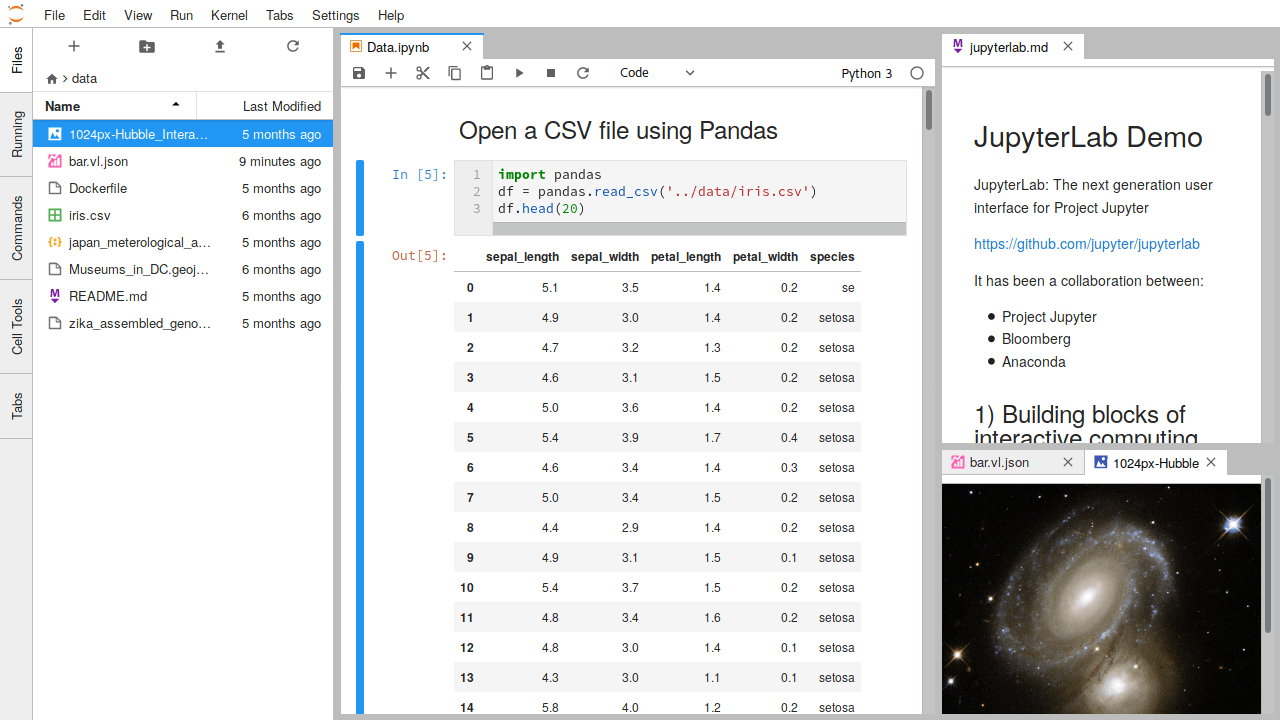
The JupyterLab interface consists of a main work area containing tabs of documents and activities, a collapsible left sidebar, and a menu bar. The left sidebar contains a file browser, the list of running kernels and terminals, the command palette, the notebook cell tools inspector, and the tabs list.
JupyterLab sessions always reside in a workspace. Workspaces contain the state of JupyterLab: the files that are currently open, the layout of the application areas and tabs, etc. Workspaces can be saved on the server with named workspace URLs. To learn more about URLs in Jupyterlab, visit JupyterLab URLs.
Left Sidebar
The left sidebar contains a number of commonly-used tabs, such as a file browser, a list of running kernels and terminals, the command palette, and a list of tabs in the main work area:
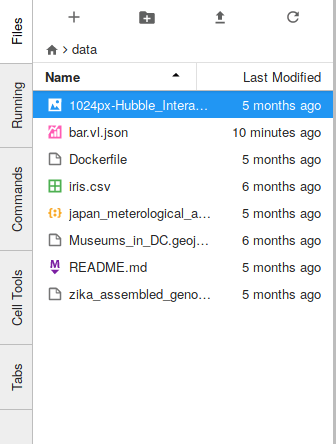
JupyterLab extensions can add additional panels to the left sidebar.
Main Work Area
The main work area in JupyterLab enables you to arrange documents (notebooks, text files, etc.) and other activities (terminals, code consoles, etc.) into panels of tabs that can be resized or subdivided. Drag a tab to the center of a tab panel to move the tab to the panel. Subdivide a tab panel by dragging a tab to the left, right, top, or bottom of the panel:
The work area has a single current activity. The tab for the current activity is marked with a colored top border (blue by default).
Tabs and Single-Document Mode
The Tabs panel in the left sidebar lists the open documents or activities in the main work area:
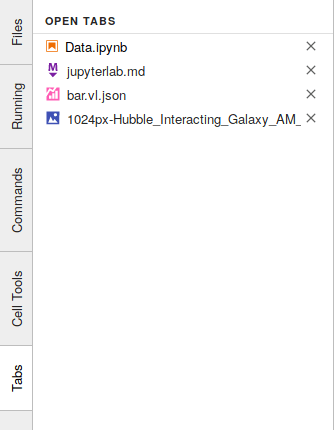
The same information is also available in the Tabs menu:

It is often useful to focus on a single document or activity without closing other tabs in the main work area. Single-document mode enable this, while making it simple to return to your multi-activity layout in the main work area. Toggle single-document mode using the View menu:
When you leave single-document mode, the original layout of the main area is restored.
Keyboard Shortcuts
As in the classic Notebook, you can navigate the user interface through keyboard shortcuts. You can find and customize the current list of keyboard shortcuts by selecting the Advanced Settings Editor item in the Settings menu, then selecting Keyboard Shortcuts in the Settings tab.
You can also customize the text editor to use vim, emacs, or Sublime Text keyboard maps by using the Text Editor Key Map submenu in the Settings menu: